To do this project, you will need a Piper Computer Kit
Skills & Time
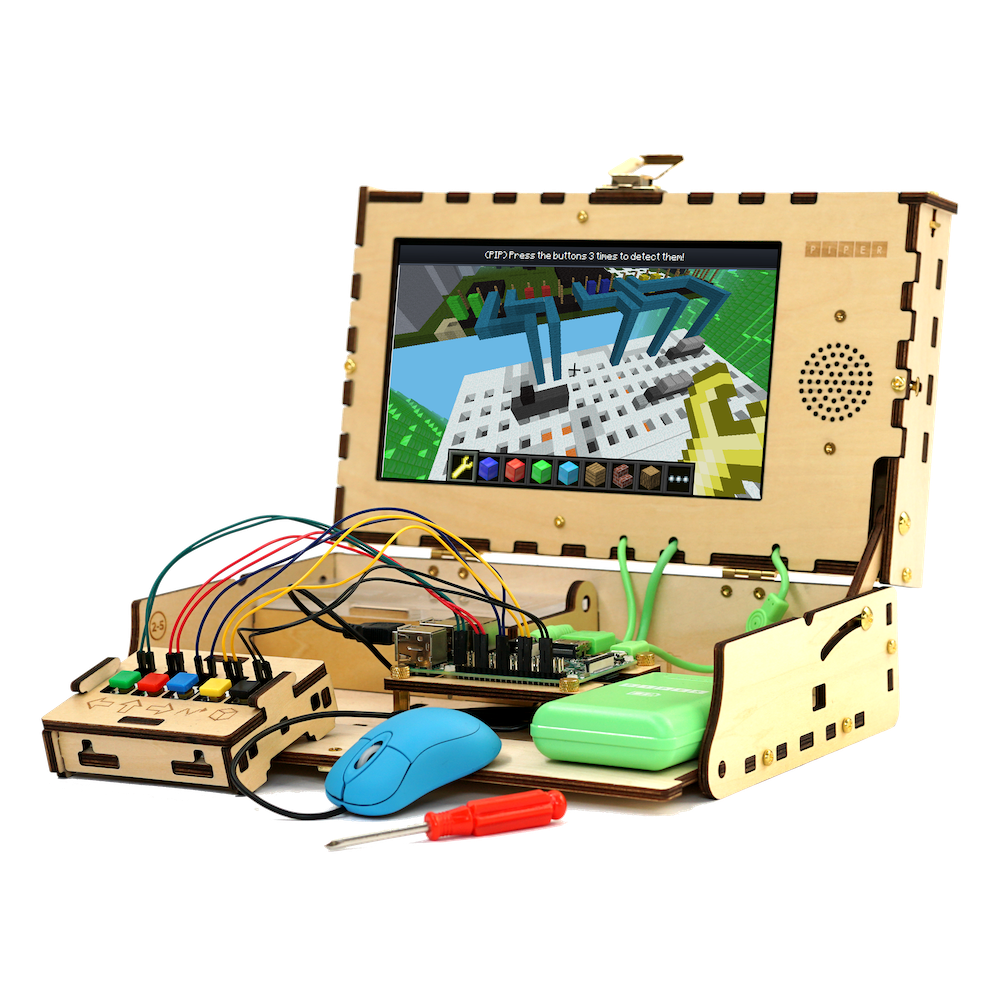
To do this project, you will need a Piper Computer Kit
Skills & Time

Time: 30 minutes Age Range: 8+ Difficulty: Beginner
To access this project from the Piper Computer Kit main menu, click StoryMode then click Cheeseteroid.
Look for the planet image like you see on the right!
(Note:You must have completed Chain Reaction before unlocking Power Plant.)

Piperbot has found himself in a whole new world! Help Piperbot activate the Power Plant to open gates, release & pump water, and raise elevators. Once completed, make your way to the next portal. Good luck!
In this level, you will review buttons and switches while learning about hydroelectric power generation (NGSS Secondary school concept). As water falls, it releases kinetic energy which is transformed by the Power Plant's generator and stored in the battery. The energy in the battery can be then released to activate gates and elevators.


In this project, the crafting table is easy to find. Right click on the crafting table and go into PipingMode to get your electronics build instructions.
In PipingMode, the instructions will have you grab a small button from your storage chest. The diagram shows a second switch on the mini breadboard, you will receive instructions on building that later. Use GPIO pins 34,36.

Once back in the game, hold the button down and see how the electricity now flows in the game. Also, by holding the button down the door will open once the electricity flows around it! Exit through the door and follow the path to get to the next challenge.
Once you enter the Power Plant room, find the crafting table and right click it to enter PipingMode. The instructions will have you find a fixed switch in your storage chest. Build the switch next to the button. Use GPIO pins 18,20.
In this challenge, use the button and switch to open the valve and lower the elevator. Close the valve to raise the elevator and move to the next challenge.
In our next Power Plant challenge, we now need to use a combination of the button and switch. Use the switch to open the water release valve. Use the button to pump water back into the tank to charge the battery. Repeat this process until the battery is 100% charged! Once charged a door will open and on to the next challenge.
In our final Power Plant challenge, we now need to use a combination of the button and switch to charge two batteries. (Note: The button won't work until both batteries are charged.) Start by turning the switch on. Once the batteries are charged then hold down the button. Electricity will flow and the portal will open!
For young people, the biggest pain point is having the manual dexterity to properly seat the switches in the mini breadboards. This is a good opportunity to check for bent leads, as they may start to cause an issue. Be sure to check your equipment diligently and pay extra attention when wiring components.
Not official Minecraft product. Not approved by or associated with Mojang. The Raspberry Pi Edition of Minecraft by the Raspberry Pi Foundation is licensed under the Creative Commons Attribution 4.0 International License.
