To do this project, you will need a Piper Computer Kit
To do this project, you will need a Piper Computer Kit

Time: 30 minutes Age Range: 8+ Difficulty: Beginner
 To access this project from the Piper Computer Kit main menu, click StoryMode then click Cheeseteroid.
Look for the planet image like you see on the right!
Welcome to your first mission on Mars! Your first task is to help Piperbot move. First, complete a circuit in the game then physically completing circuits with jumper wires connected to GPIO (Global Placement Input Output) pins on the Raspberry Pi. Good luck!
In this level, you will learn about electrical currents, conductivity and circuits which will be the basis for the rest of your missions going forward. After connecting the red wires, there is an electric current flowing through both pins on the Pi that sends a message (INPUT) for Piperbot to move forward or slide sideways. (Note: See video on connecting the two red wires.)
Once the circuit is completed, the current flow properly. When the wires are placed into the breadboard (the controller), pushing the button, rather than touching the metal ends together, allows the current to flow. The materials used have different electrical properties. The metal in the wires is a good conductor which lets electricity flow. The insulation surrounding the wire is not a good conductor, and it protects our hands from the electric current flowing on the wire. (Note: Good electrical conductors include most metals, bad electrical conductors (used as insulators) include wood, glass, plastic, air, and rubber.)

This first challenge is to get kids thinking about electronics and completing circuits. It's also a great place for Minecraft "newbies" to learn the basic game controls:
- Left click = break blocks
- Right click = place blocks
- Scroll wheel = select block to place
(Note: The character Piperbot is not able to to move in this first challenge. In order to move, you must build a controller which is the next step. See the video below.)
Now that you have completed a circuit digitally, our next challenge is to complete a circuit physically. Take out two red wires and follow the video and image to connect the wires to the correct GPIO Pins.
Once the red wires are connected like the image below, touch them together and immediately you will jump back in the game and your character, Piperbot, is now able to move! Follow the instructions at the top of the screen to find the door, right click to open and go up the stairs.

Crafting tables are the method that we will use to provide instructions on building electronics in this project and all the remaining projects as well. By selecting the wrench with your scroll wheel, right click the crafting table to get instructions on what to build next.
Once the crafting table is clicked, we will go into PipingMode where you'll be provided instructions on building the red, green and blue buttons.
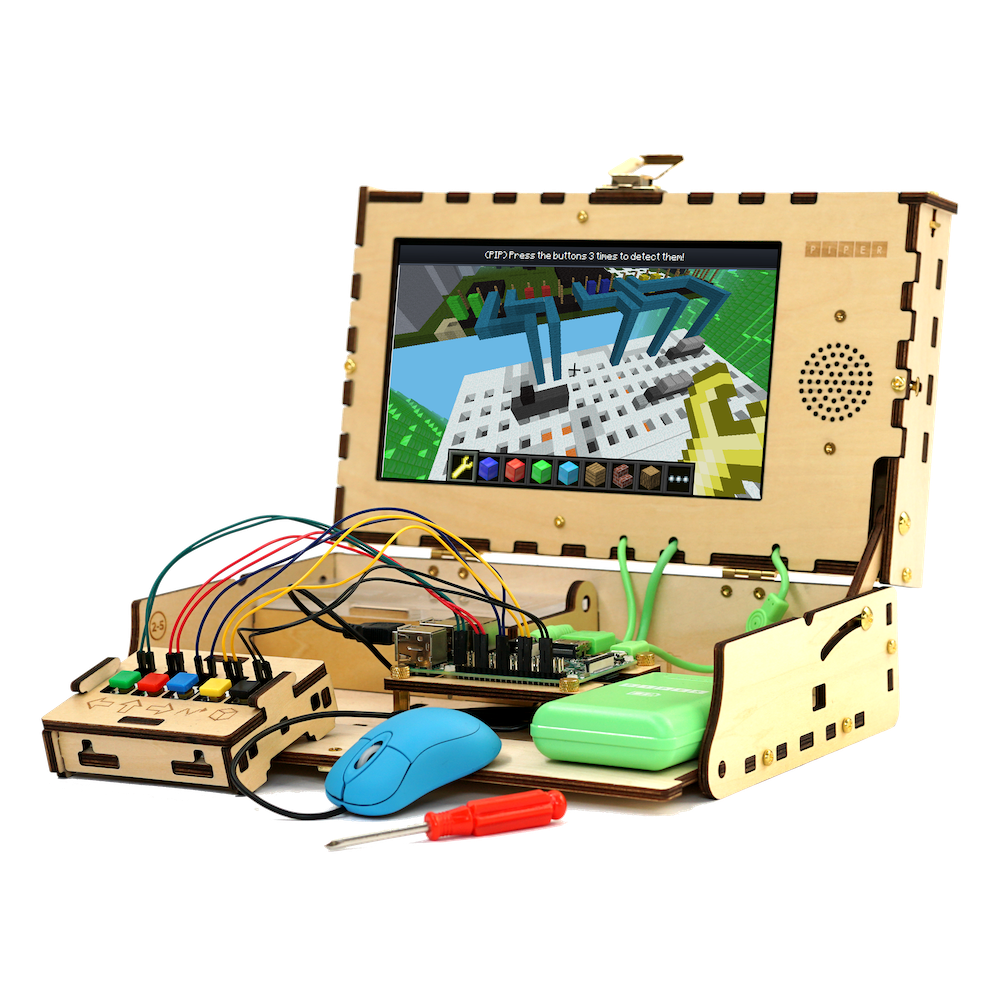
You will now build your red, green and blue buttons by attaching the wires to the GPIO pins on the Raspberry Pi as the image shows below. (Note that the pins on the buttons need to be in the same column as the wire, so that electricity can flow properly.)GPIO setup: Green: 40,38; Red: 32,30; Blue: 24,22.
Press the button and see if electricity flows! If the button is built correctly, you will see yellow blocks moving down the wire representing the flow of electricity, called current.


Once your buttons are built the software will automatically jump you back into the game. Now, the goal is to follow any one of the colored paths to the bottom to find the ladder. Go up the ladder, find a 2nd ladder and once you are at the top the challenge is solved.
The first questions you will receive are “Why can’t I move?” The answer is that “you haven’t built your controller yet!” They must build their “move” button first in order to move.
A common point of failure is the specific placement of the wires on the GPIO pins on the Raspberry Pi. The necessary attention to detail will take some students by surprise but will set the precedent for the level of precision expected through the game. If there are two or more students working on a single Piper, moving Piperbot with the wires while directing him with the mouse is a good way to incorporate both players.
(Note: Additionally, be sure that students are firmly placing the buttons on the breadboard. If they are loose or wobbly, the connection won’t be stable enough to complete the circuit!)
Not official Minecraft product. Not approved by or associated with Mojang. The Raspberry Pi Edition of Minecraft by the Raspberry Pi Foundation is licensed under the Creative Commons Attribution 4.0 International License.
